Monday, May 19, 2014

Starting a Typescript Single Page Application using Angular.js

I am using Visual Studio 2013 with Update 2.
The first step is to create the project.
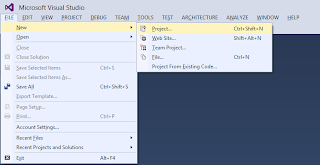


Select a typescript project.


We need to install four packages.
  • Angular.js
  • JQuery.js
  • Typescript definition for Angular.js
  • Typescript definition for JQuery.js
This means we need to run the following commands in the package manager console
  • Install-Package angularjs
  • Install-Package jQuery
  • Install-Package angularjs.TypeScript.DefinitelyTyped


It is possible to specify a specific version of the package on the command line. Without the version specification, Nuget will install the most recent version. Installing the TypeScript definition for angularjs will also install the typescript definition for jQuery.

The next step requires changing the index.html file. Below is the default file.

<!DOCTYPE html>

<html lang="en">
<head>
    <meta charset="utf-8" />
    <title>TypeScript HTML App</title>
    <link rel="stylesheet" href="app.css" type="text/css" />
    <script src="app.js"></script>
</head>
<body>
    <h1>TypeScript HTML App</h1>

    <div id="content"></div>
</body>
</html>

I am not sure why the default file has a blank line between the DOCTYPE declaration and the HTML declaration. Modify the html element to add the ng-app attribute. Intellisence helps add the definition. Add a value of "DemoApp" for the attribute name. This is the name of the single page application. Angular.js allows multiple applications.

<html lang="en" ng-app="DemoApp">

In the Solution Explorer, open the Scripts folder.


We need to include either the angular.js file or the angular.min.js file as a script. Debugging with the minified version of the JavaScript file is difficult. Grab the angular.js file; drag it under the link element in the index.html file; then drop the file. Visual Studio will insert the link.

<!DOCTYPE html>
<html lang="en" ng-app="DemoApp">
<head>
    <meta charset="utf-8" />
    <title>TypeScript HTML App</title>
    <link rel="stylesheet" href="app.css" type="text/css" />
    <script src="Scripts/angular.js"></script>
    <script src="app.js"></script>
</head>
<body>
    <h1>TypeScript HTML App</h1>

    <div id="content"></div>
</body>
</html>

Next, modify the app.ts file to initialize Angular.js. We named the application "DemoApp" above when we modified the html element. We need to add a line to the app.ts file to initialize that module. Add the following line to the app.ts file.

var demoAppModule = angular.module('DemoApp');

That declares a variable, demoAppModule, to hold the Angular.js module. The module method takes the name of the application.

Now we have a minimal TypeScript application using Angular.js.

Wednesday, December 18, 2013

Dependency Injection Automatic Factories

One of the features of the Unity Application Block is automatic factory construction. What this means is if you configure Unity to resolve type Abc, then Unity also knows how to resolve Func<Abc>.

This allows using lazy evaluation of injected properties. The code below shows how to use an automatic factory.

private Abc abc = null;
public Func FuncAbc { get; set; }
protected Abc Abc
{
    get
    {
        if (abc == null && FuncAbc != null) abc = FuncAbc();
        return abc;
    }
}

When the code accesses Abc the getter checks the underlying private field abc to see if it is null. If it is null, then the code checks to make sure the factory FuncAbc is not null. If the factory is not null then it creates a new instance by calling the factory FuncAbc.

Wednesday, May 8, 2013

I am presenting a talk entitled Refactoring To Allow Unit Testing at code camp.

Sunday, February 24, 2013


I submitted three talks to Philly.Net Code Camp http://phillydotnet.org/
  • Improving the Quality of Code
  • Refactoring To Allow Unit Testing
  • Calling an Unsigned Assembly from a Signed Assembly
Hopefully I will be selected to give at least one.

Sunday, January 27, 2013

Powershell is a fun tool. Here is a one line command to select a random line out of a text file. Assuming you have a text file with the file name of "names.txt" the following command will pull one line out of the file at random.

Get-Content names.txt | Get-Random

Wednesday, September 8, 2010

Joys of Removable Version of MediaWiki and SVN

I have a variety of flash memory devices. I picked a two-Gigabyte device to put a copy of MediaWiki and SVN. I now can access my personal wiki everywhere I go.

Wiki on a Stick

CH Software created MoWeS, an entire WAMP (Windows, Apache, MySQL, and PHP) stack that run without the need to install anything. MoWeS allow selecting which version of Apache, PHP, and MySQL. MediaWiki is an additional option along with other great options like ImageMagick, TYPO3, and SugarCRM. MediaWiki provides an installation page. The instructions are not quite right. Download the packages from CH Software then run moves.exe. That unpacks the files.

SVN on a Stick

I use TortoiseSVN. This integrates SVN with Windows Explorer. TortoiseSVN has the option to create a repository by just right clicking on a directory. This makes it simple to create an SVN repository on a memory stick.

Performance

Performance of SVN is a slow on my two-Gigabyte flash drive. The advantage of taking both my personal wiki and an SVN repository with me anywhere outweighs the performance issues.

Sunday, September 5, 2010

ASP MVC 2 – NUnit based unit test project template For Visual Studio 2008

Piotr Kwapin wrote an article about creating a NUnit based unit test project template for ASP MVC2 for Visual Studio 2010. I am still using Visual Studio 2008. This was an interesting learning experience. I never previously delved into project templates.

Piotr Kwapin mentioned this would work with Visual Studio 2008 but did not elaborate. I was able to get it working after some rather scary moments.

Download the Template

The first step is to download the template updated for Visual Studio 2008. The template is a zip file containing the following.

  • Controllers
    • AccountControllerTest.cs
    • HomeControllerTest.cs
  • Properties
    • AssemblyInfo.cs
  • App.config
  • MvcApplicationTest.csproj
  • MvcWebApplicationNUnitBasedTestProjectTemplate.cs.vstemplate

Put the template file in the template directory. On a PC running a 64-bit operating system, this directory is located here. Do not unzip or extract files from the zip.

c:\Program Files (x86)\Microsoft Visual Studio 9.0\Common7\IDE\ProjectTemplates\CSharp\Test\

Download the Registration File

The next step is downloading the updated registration file. Extract the registration file and execute it. Windows will issues several warning and confirmations about running the file.

Running Devenv Setup

Piotr Kwapin did not document the last step as completely. You need to open up a command line as administrator that has the path setup to run devenv.exe. On Windows 7, select Start, All Programs, Visual Studio 2008, and then Visual Studio Tools.


Right click on Visual Studio 2008 Command Prompt and select Run as administrator. Enter the following command.

devenv /setup


The first time I did that, Visual Studio 2008 forgot about all its templates. I suggest running the command a couple of times. I ran the command around a dozen times as I made minor changes to the files to get them to work with Visual Studio 2008. I documented the changes I made to the files below.

Changes to the VSTemplate File

I changed the version number for Microsoft Visual Studio from 10.0.0.0 to 9.0.0.0. Below is the updated line.

<Assembly>Microsoft.VisualStudio.Web.Mvc.2.0, Version=9.0.0.0, Culture=neutral, PublicKeyToken=31bf3856ad364e35</Assembly>

Changes to the CSProj file

I changed the tools version from 4.0 to 3.5. Below is the updated line.

<Project ToolsVersion="3.5" DefaultTargets="Build" xmlns="http://schemas.microsoft.com/developer/msbuild/2003">

Changes to the Registration File

I made two changes to the registration file. The first is a change to the name of the template. I compressed the template files into NUnitTestVS9.zip. The second change is the change of the HKEY to Visual Studio 2008. The two lines below show the changes.

[HKEY_LOCAL_MACHINE\SOFTWARE\Wow6432Node\Microsoft\VisualStudio\9.0\MVC2\TestProjectTemplates\NUnit\C#]

"Template"="NUnitTestVS9.zip"

A New ASP.NET MVC 2 Web Application

Creating a new ASP.Net MVC 2 Web Application in Visual Studio 2008 creates both the project and allows creating a NUnit test project. Below is an example in Solution Explorer.